Tuesday, September 13, 2011

Turtle Tutorial

Hello all!! Here is the turtle tutorial as I promised as well as some of the pictures from the wedding! Hope you enjoy... I tried to make the tutorial as straightforward as possible but if there are any questions please let me know :).


Use a bakeable clay, and a small sea shell

Break the clay in half, it should be a little larger than the shell and twice as thick
and then roll into a ball. Make sure that there are no cracks.

Begin to form the head by pinching and smoothing.

Use a small knife to cut the sides into arms

The end area you can pinch off into a tail, shape the arms and legs as you do this.

Then place the shell on top making sure that the clay goes in fairly deep
so that it will not fall off.

Add eyes with different colored clay and a smile, and then smooth out all cracks. 


Bake for however long
the clay instructions say. The shell stays on during the baking process.

And then add a thick base coat. You can then add other designs on your turtles shell.


Spray or paint on a gloss or acrylic sealer afterwards.


                                            The Wedding


Bride with all the bridesmaids and groomsmen

It rained just beforehand but turned out to be a beautiful day..

Me

The lovely table arrangements...

The cake

Sunday, September 4, 2011

Under the sea

  Around this time of year until late October baby sea turtles begin to hatch along the coast of Florida. Five species of sea turtles inhabit Florida's waters during some time of the year but only two lay their eggs here. Florida's nesting sea turtles include the loggerhead (most common), and leatherback (least common). During the summer months, there are approximately 50,000 sea turtles in Florida. This makes it the most important nesting area in the United States. My family and I often go to the beach at night to watch these massive sea creatures magically appear out of the water and scoot up the sand to lay their eggs, and then vanish mysteriously back into the dark depths of the ocean.
My second oldest sister Amber is getting married at Anna Maria Island on Saturday, and she asked me a while back to make clay magnet turtles as gifts for the guests. I procrastinated quite a while so now I'm rushing to finish them this last week. She also asked me to play "That's Amore" my grandmothers favorite song at the recital dinner, so its time to break out my flute and music and polish up a few rhythms here and there. I will probably post a tutorial on how to make one of these turtles over the next few days just for fun :). And perhaps when we go to visit we will get lucky enough to see a real sea turtle hatching as well! Hope you enjoy!
~ Heidi


Which one is your favorite?


Monday, August 29, 2011

Fantastic Felt

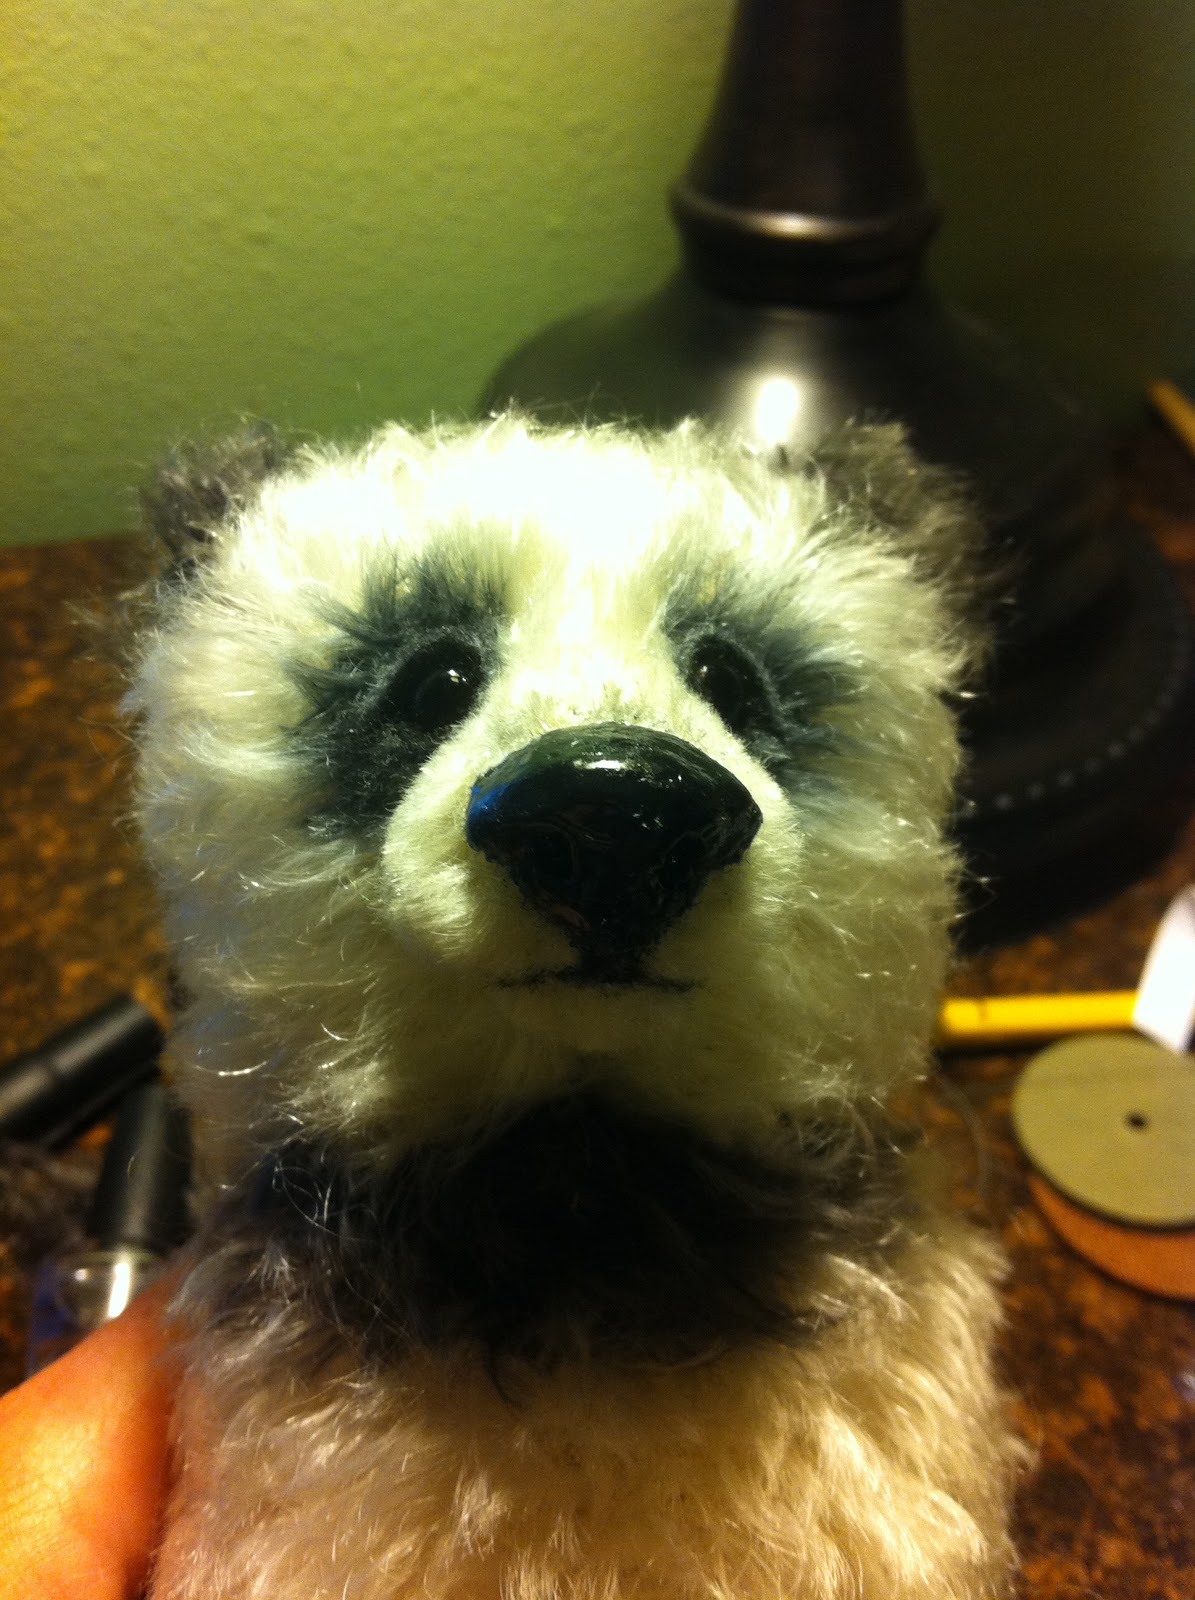
  Now that all of my bears are gone my desk has lots of extra space. I decided it was time I try some new techniques, and some new materials as well. Joanne Livingstons blog has some great photos and descriptions on how to needle felt so I've been studying that lately and trying out my hand with the wool. Its probably the strangest stuff I have ever worked with.... you take this long barbed needle and some fluff and just stab it over and over again and it turns into hard felt, depending on how and where you stab the needle determines the shape you are going to create. Its almost like working with fuzzy clay! So far I tried to make a panda bear face but it didn't turn out so well when I tried waxing over the felt nose with Yankee candle wax....... (Live and learn!) So I tried again! This time I changed my pattern to give the face more width to make it look more like a panda.... but it ended up being a polar bear. It wasn't exactly what I wanted, but I'm not complaining! After I felted the face I still felt like there was more I needed to do. I started rooting in mohair just around the edges of the felt, and before I knew it I had half a face already done. Surprisingly I enjoy rooting in the hair.. it takes a lot of time but the results are rewarding. After I did the left side of the polar bears face I took a brush and combed over the places I had put in hair, and I was very happy to discover that none of it came out!  I still have a lot of work to go on this face, the nose needs to be smoothed over (you can see the hard edges where the paint brush was picked up) , the eyes need to be shaded and hairs worked in, the other side of the face needs more hairs as well and some scissor sculpting afterwards. But I am in no hurry, I really want to take my time on this bear and just explore the techniques.

 Best wishes and happy bear making to all!
       - Heidi


Here is the needle I use, and the wool.
I'm not really sure yet how to use the block correctly.
The felt sticks to it and makes it frizzy and hard to control.


Here is mohair that I dyed myself
(of course I did nothing with the white piece but rinse it out and toss it in the dryer to make it fluffy.)


The nose and eyes still need work.


Here is a picture I added a few days later.
He turned into a panda after all.. go figure!

Friday, August 12, 2011

Golden Teddy

 Hello everyone!!! Please meet my newest teddy, a golden bear made of imported 3/8" synthetic! This little guy is a tad under 5 inches sitting, and he is filled with polyfill and weights to give him that big grizzly feel! I took a lot of time to scissor sculpt the details on his face, as well as craft him a shiny black nose made of clay. He is 5 way jointed and has black leather paw pads that were then sculpted by me just using a needle and thread. Its been so much fun creating this guy, and he will be the last bear of the summer for me, it's time to get back and focus again on school work. Him and his little brother "Beddy Teddy" will be heading off to their new homes this week; I will miss having all of the bears I made around but each one has been a great learning experience I will never let go of. I hope you enjoy him as much as I have!
 Best wishes! - Heidi


Wednesday, August 10, 2011

Flying bears!

 Summer is just about over, but before school started my dad decided to take a trip up to Pennsylvania to visit our relatives. Wednesday morning my dad, brother and I boarded a little plane and then in two hours landed in Allentown, PA. The flight was quite humorous for my older brother Hans offered to carry my bag full of sewing supplies (fray check, needles, scissors, pliers); I had checked beforehand to make sure these items could be brought through security but I was still a little nervous. Nevertheless the plan worked and he brought my sewing supplies on with a straight face (he was unaware of the "dangerous" items inside lol), and I was able to work on my bears during the flight! Saturday morning we drove the rental car up to my great aunts house, and I surprised her with a bear I had made for her. She recently was in the hospital and is still recovering so I thought she would appreciate the gift; especially since she is a seamstress herself! I received my school schedule on Sunday, I will be taking 5 AP courses so it will be a difficult year for me yet I am so excited to be finishing my last year of high school and going to college! I decided to put my monkey away for a little bit until I finish this last bear that way I can send them all off to their new homes before school begins, on the weekends I should hopefully be able to work on the monkey :).  Here are some pictures of our trip so far, and my work in progress!
    - Heidi


A butterfly found on our morning hike


Here are some beautiful flowers that are growing in my Grammy's yard

Here is a birds nest that she had found and showed to me.

This is where they used to store apples before refrigerators!

I was just playing around with some clay while I was packing

Here is my aunt and her new bear!

The last bear I'm working on before school starts

Heading home! This trip gave me some very good ideas, I can't wait to finish
this bear on the plane!!!

Wednesday, July 20, 2011

Change

   As Benjamin Franklin once said, "Without continual growth and progress, such words as improvement, achievement, and success have no meaning."  Whether we like it or not change is an everyday part of life, many of us struggle to face it where as others rush head on to meet the challenges rapidly thrown at us. Change is sometimes drastic, the loss of a job, a home, a loved one, and yet it can also be progressive and positive. Change has been occurring since the beginning of time as the seasons turn from summer to fall and to winter, the leaves turn into a kaleidoscope of dancing colors and then drift to the floor in exhaustion. Although seasons do not change in Florida (our leaves stay green or brown all year long, and we pretty much never get snow) obviously many other things do. My absolute favorite material to work with is clay... I have immensely enjoyed sculpting all of the noses on my bears and I can honestly say that is what make my bears unique and mine. Since I began making bears I have been wanting to combine even more clay into my work but was not quite sure how.... So just like the leaves in autumn I decided it was time for a little change to mix things up. My next creation I will be working on is a soft/hard sculpture monkey in a dress... YES I did just say that. I'm not sure if this will be a complete flop but so far it has gone well I think. Ive attached some pictures of this work in progress, its been quite hard to photograph because the face of the monkey is so tiny.. only the size of one of my thumb prints; enjoy! I hope that you will add a little change to your day too :).
               - Heidi


Thursday, July 14, 2011

Rabbits, dogs , bears oh my!

Expecting to find my AP exam score results today in the mail I was not at all disappointed when I found a small brown package all the way from my Grammy Nancy in Pennsylvania instead! Curious as to what could be in the box for it wasn't my birthday, or Christmas for that matter I was surprised to find a little 6 inch antique bear in wonderful condition! With the bear she included a letter which said "I'm sending this Steiff bear that I have had in my possession for many years. It's very old and as you can see the bear has the Steiff signature label in its ear showing that it was made in Germany. I had seen one the same size at an antique auction house years ago that was selling for $125. When you were little, I left Hans and you pick from Steiff animals to take home. I hope you still have them." Well I happened to have the two other Steiffs sitting on my desk at the moment so I thought I should take a picture of this happy family reunited :). I hope they bring a smile to your day as they did to mine !
- Heidi

I've only done a little research so far but I think he could possibly be from the 1950's..?

This little guy is the first hand made bear I have seen made by someone else. It is interesting
to compare the feel and look at the techniques that Margarete steiff  had used. Her bear is much
harder than mine and the stuffing is firmly packed; mine are very soft and theres not so much stuffing.
 I wonder if all of the stuffing helped preserve the bear over time. This might be a technique
I should look into.